
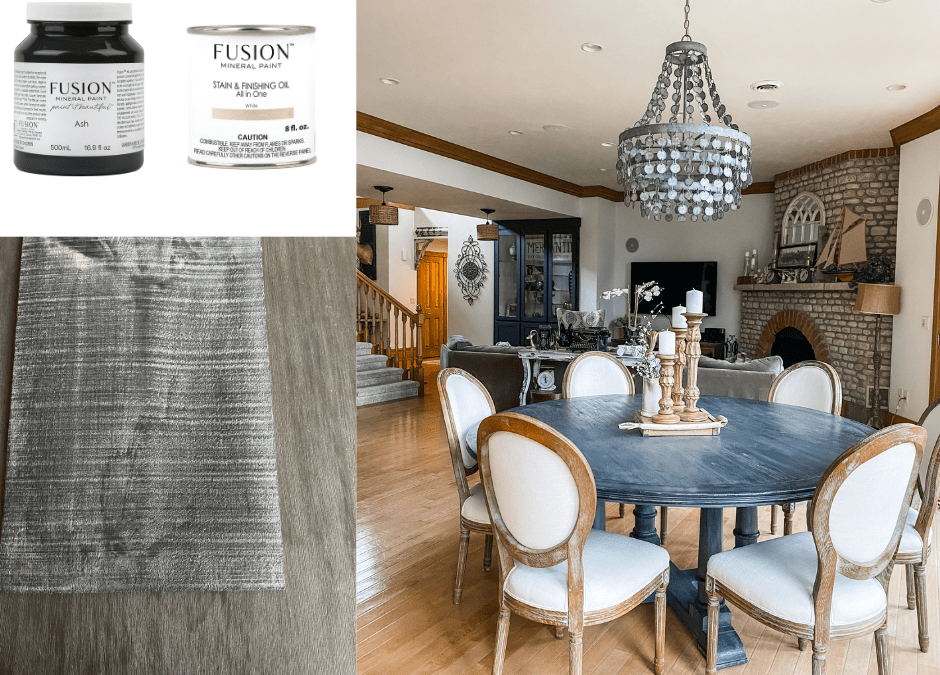

When I posted my space on my Facebook page I did not expect everyone to go crazy over my dining table. Yes, I love it too, but the feedback over the table was pretty overwhelming. The big question was “Did you paint it?” Followed by “What color did you use?” So there was an obvious demand from my following for a finish that they could do to achieve a similar look. So out came the Fusion Mineral Paint products and I knew just what to grab.

Products Used
- Fusion Mineral Paint Ash
- Fusion Mineral Paint Stain & Finishing Oil in White
- Lint Free Towels for wiping back
- Natural Bristle Double Thick Brush
- Staalmeester Pro-Hybrid Painted Brush
- Natural Stain & Finishing Oil (optional)
Let’s start with talking about your surface. For a finish similar to my dining table you are going to want some texture or wood grain. A heavily grained piece will be ideal for this look but not necessary. If your surface is super smooth, don’t worry, you can still get this look. You can create texture too by doing a few options.
- Using a natural bristle brush such as the Staalmeester Natural Paint/Wax brush.
- You could create a faux texture using our Smooth Embossing Paste and a wood graining tool.
- As your paint starts to dry, you could drag your brush through it some more. Gosh, I never thought I would say that. Yes, I’m encouraging brush strokes.
- Sand down to raw wood so your paint may raise the grain. You can also use a wire brush to create more texture.
- If you would like to thicken your paint you could also mix in some Fresco which will also help create texture.
Again, I do want to emphasize that you can still achieve a pretty awesome look without even doing any of those “additional techniques”. Just using paint and stain and playing with your pressure when you’re wiping back is truly key.
Let’s Get Started
So I painted a sample board for you guys. This is what it looked like with only 1 coat of Fusion Ash. 1 coat was all I needed.

I allowed the paint to completely dry. After about 2 hours I knew it was ready for the Stain & Finishing Oil. Make sure you stir very well with the SFO. The pigments can tend to settle on the bottom of the can.

Next I used the Natural Bristle Double Thick brush and put a coat of the Fusion Stain and Finishing Oil in White over the entire painted surface. I purposely put it on a little lighter in some areas to give it a little more dimension and I knew I would also be wiping it back.

After it was all applied, I immediately wiped back. I did not wait. Using the blue lint free shop towels, I wiped back until I achieved my desired look. One trick I found is that if you feel you can’t get enough off and you want to show more of your base color, so in my case Ash, you can apply some of the Natural Stain and Finishing Oil and that will re-activate the White and work like an eraser making it easier to wipe back. Having the Natural on hand is great because it can be used for so many other projects too.

So now it was time to go and compare the finishes. One thing I always tell my customers is that lighting matters. My dining space is surrounded by floor to ceiling windows so my table often looks blue but it’s actually a slate grey. That’s why I chose Ash. Ash is one of those colors that can also change depending on the lighting. Sometimes it too will give off a different look depending on how the light hits it. Regardless, in my opinion Ash looks good on everything. Here is the final look on top of my dining table.


You could do any color combination that you like and the Stain & Finishing oil also comes in other shades such as Cappuccino, Driftwood and Ebony. The options for a similar finish are truly endless. I hope this look inspires you to create a weathered wood look too.
Happy Painting,
Denell, owner at Painted